How to Compress JPEG File Size Without Compromising Quality

Compression of JPEG includes multiple methods, like online optimization tools, built-in system software, applications, and WordPress tools. You can find both a manual and an automatic compression tool.
JPEG is one of the most popular image formats on the web that is used by SEO experts, photographers, & website owners. In fact, about 77.9% of websites use JPEG images. A large JPEG file can kill your SERP ranking and user experience.
However, JPEG files can be so large that a single one can slow down your website’s speed. Compressing JPEGs reduces file size while preserving visual quality, improving page speed, user experience, and even SEO.
So, let’s get an in-depth understanding of manual and automatic methods for free & paid JPEG compression.
What is a JPEG Image File?
A JPEG/JPG (Joint Photographic Experts Group) image file is a default and popular digital image format for photography. This format became the first choice of digital media in the 80s and 90s due to its quality.
File Extensions: .jpg or .jpeg
Lossy Compression: This uses a lossy compression algorithm to store photographs and other complex images with many colors. This means, every time you save or edit a JPEG image, it loses some pixels from the image.
Color Support: Because JPEG supports 24-bit color, that means it can capture over 16 million colors. This quality makes it ideal for photographs and realistic images.
One more thing, JPEG does not support transparent backgrounds (unlike PNG or WebP).
Over time, there have been multiple image formats developed with their own qualities. But still, more than 75% of website images have the JPG format.
Lossy vs. Lossless Compression: What’s the Difference?
JPEG follows lossy compression, but there are PNG-type images that follow Lossless compression. They are modern image file types like PNG that do not degrade during edits.
Lossless compression keeps your every pixel intact. By contrast, lossy compression (used by JPEG) eliminates some image data to achieve much higher compression ratios. Lossy JPEG compression can cut file sizes by up to 90% with almost imperceptible quality loss.
For example, when a tool compresses a JPEG/JPG file, the tool “analyzes textures, patterns and colours” to create an “optimally compressed JPEG file,”.
So, you can enjoy a quality image but less in size.
Why Compress JPEG File Size? Benefits for Web Performance and SEO
Compressing JPEGs is about more than just saving disk space. For example
Great User Experience
Google found that a delay of just 0.5 seconds caused a measurable drop in traffic and user satisfaction. A smaller image will take less time to load, which will result in retaining the user on the website.
Higher Ranking on SERP Result Page
Google algorithm rewards those websites that have faster-loading pages with a great user experience. So, you definitely need to use good-quality images without compromising on quality. An optimized image will require less bandwidth to serve.
Other than these, a smaller image will require less space, and you need to purchase extra hosting space.
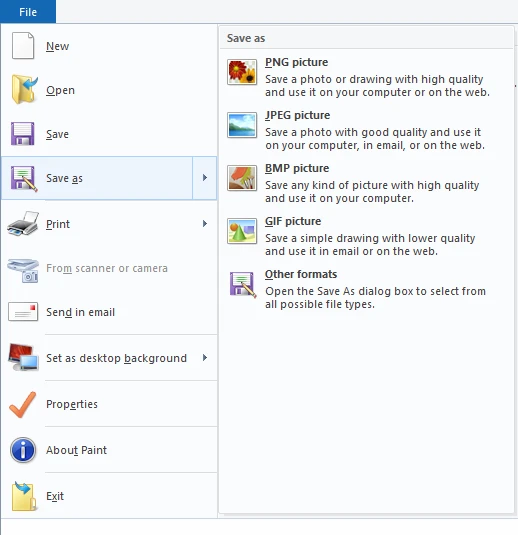
Manual JPEG/JPG Compression on Windows
You can find multiple free installed tools in your Windows. JPG is another file extension of the same JPEG file that is accepted by Windows. You just have to know how to use it.
Using the Windows Photos App
Windows’ built-in Photos app (the default image viewer) can resize and compress JPEGs. This is a basic and quick editing tool that anyone can use for their basic work.
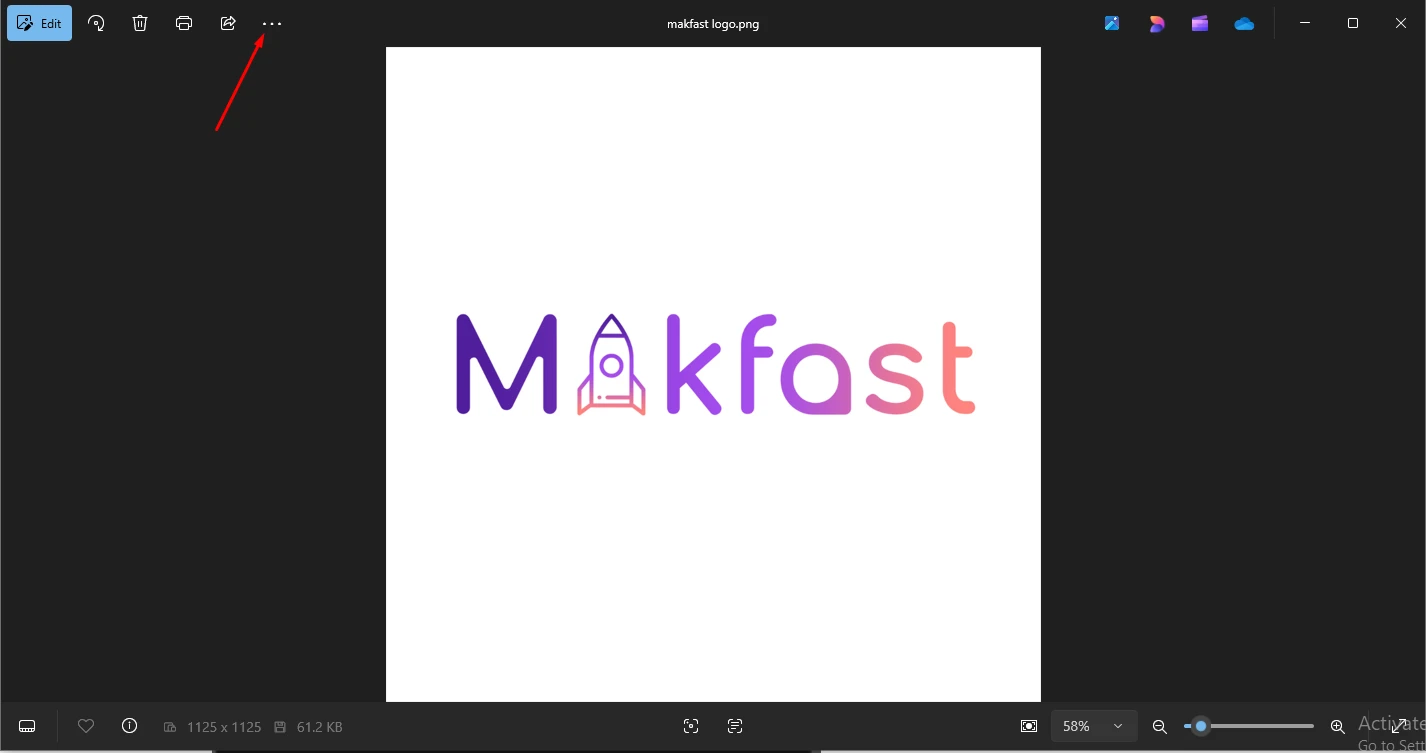
To use it, right-click your JPEG file and choose Open with Photos.
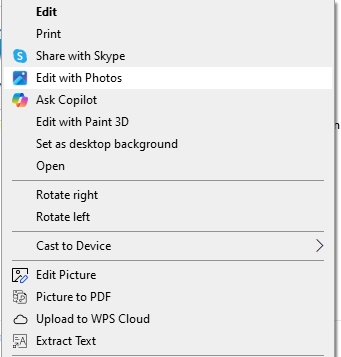
Then click the “Three Dot” (more) icon and select Resize.
In the resize menu, you can pick preset sizes or enter custom dimensions.
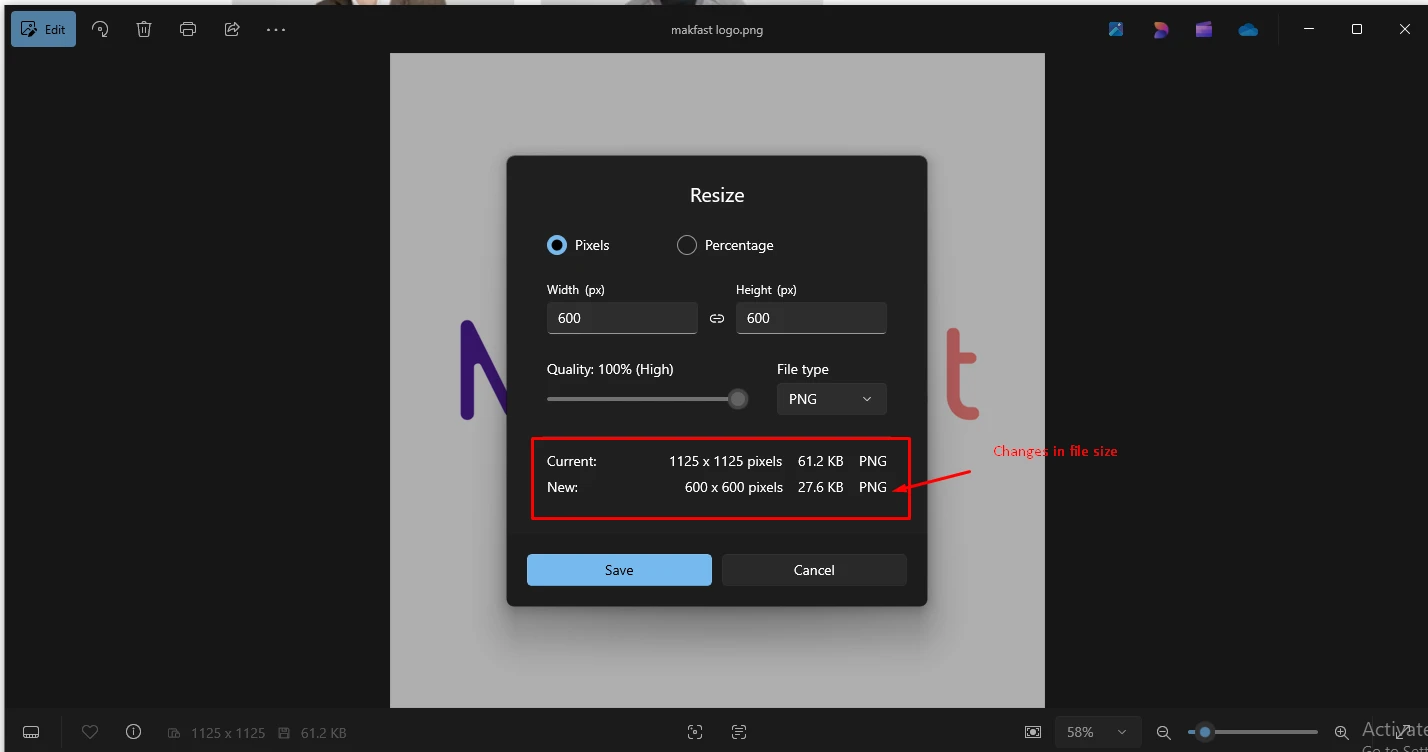
You can also see a “Quality” slider to resize the quality of the image file. As a rule of thumb, you should keep quality settings around 80% (High) usually yields a good balance. This means the image looks nearly identical to the original, but the file is much smaller.
Once you’ve adjusted size/quality, click Save and give the file a new name.
Using Microsoft Paint
You can also use Microsoft Paint (the classic app) to compress JPG images.
Start by opening the JPEG file with the Paint tool (right-click -> Open with -> Paint).
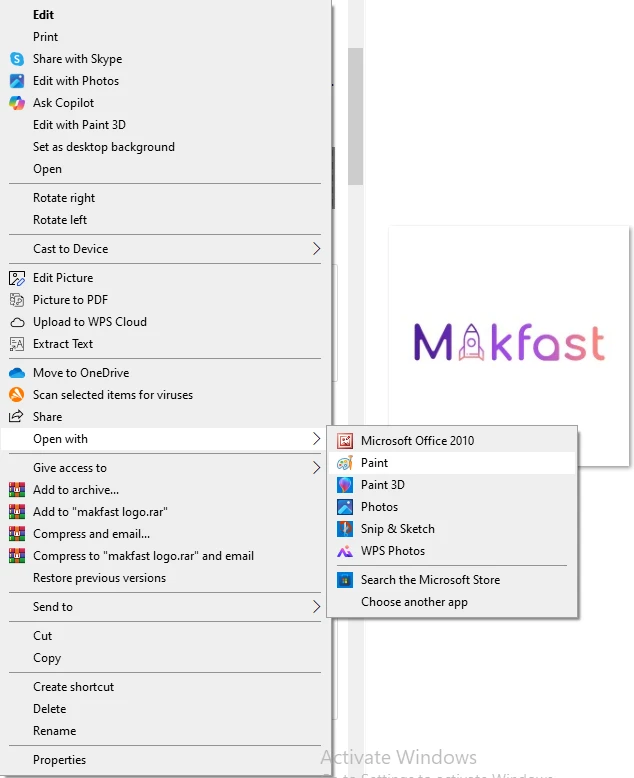
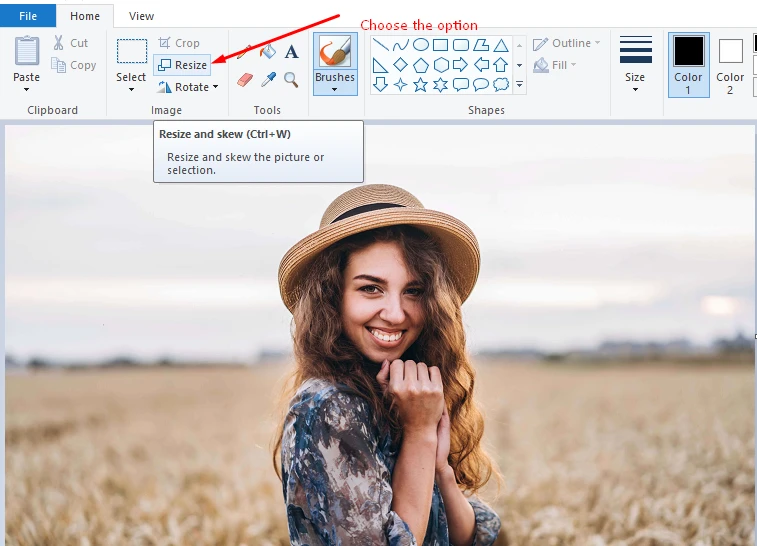
Under the Home tab, click Resize and Skew.
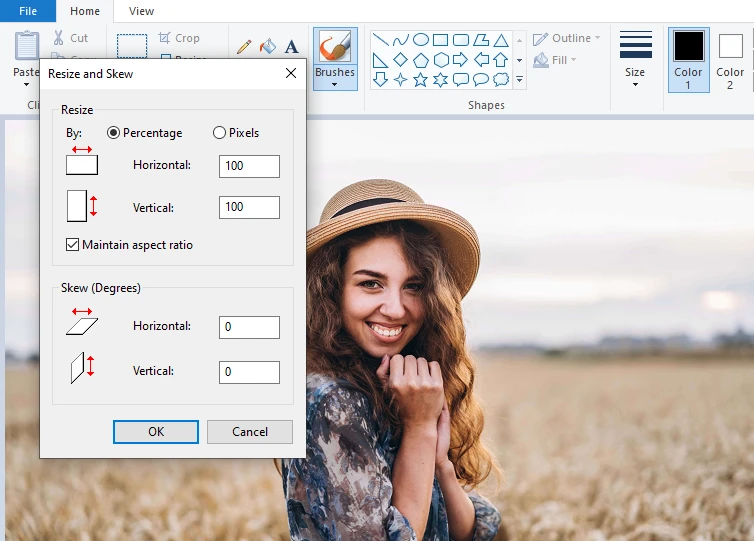
There is a new dialog box that will pop out, choose to resize by percentage or pixels.
For example, entering 50% for both Horizontal and Vertical will cut the width and height in half (and roughly quarter the area).
When choosing pixel mode, you should to “Maintain aspect ratio” on both sides to avoid stretching.
Click OK, then go to File -> Save As. Make sure to save the resized JPEG using a new name.
This simple approach can compress a JPEG image by more than 45%.
With Paint, reducing dimensions is the main way to compress. You should consider resizing the image to around 60- 80 percent based on the size of the image.
Manual JPEG Compression on macOS
Apple’s Mac operating system also has an image editing tool to compress JPEG images.
Using Preview’s Adjust Size
The built-in Preview app on Mac can easily resize JPEGs. This tool is really easy to use and just needs a simple understanding to use
Simply double-click your photo to open it in Preview.
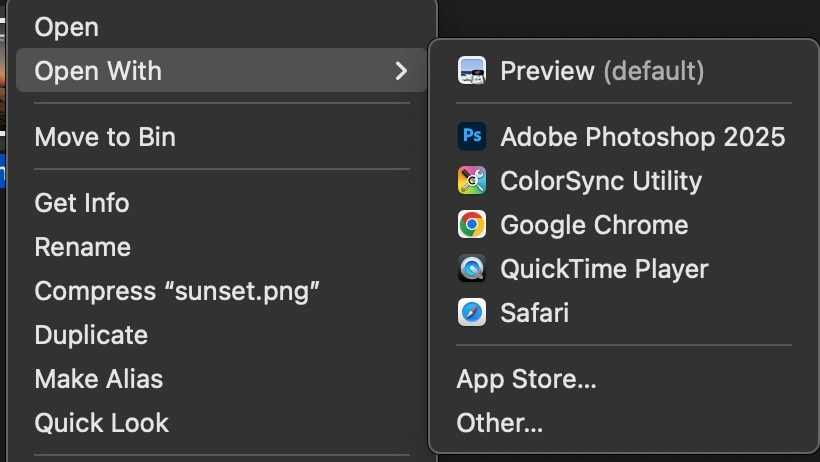
Then go to Tools -> Adjust Size
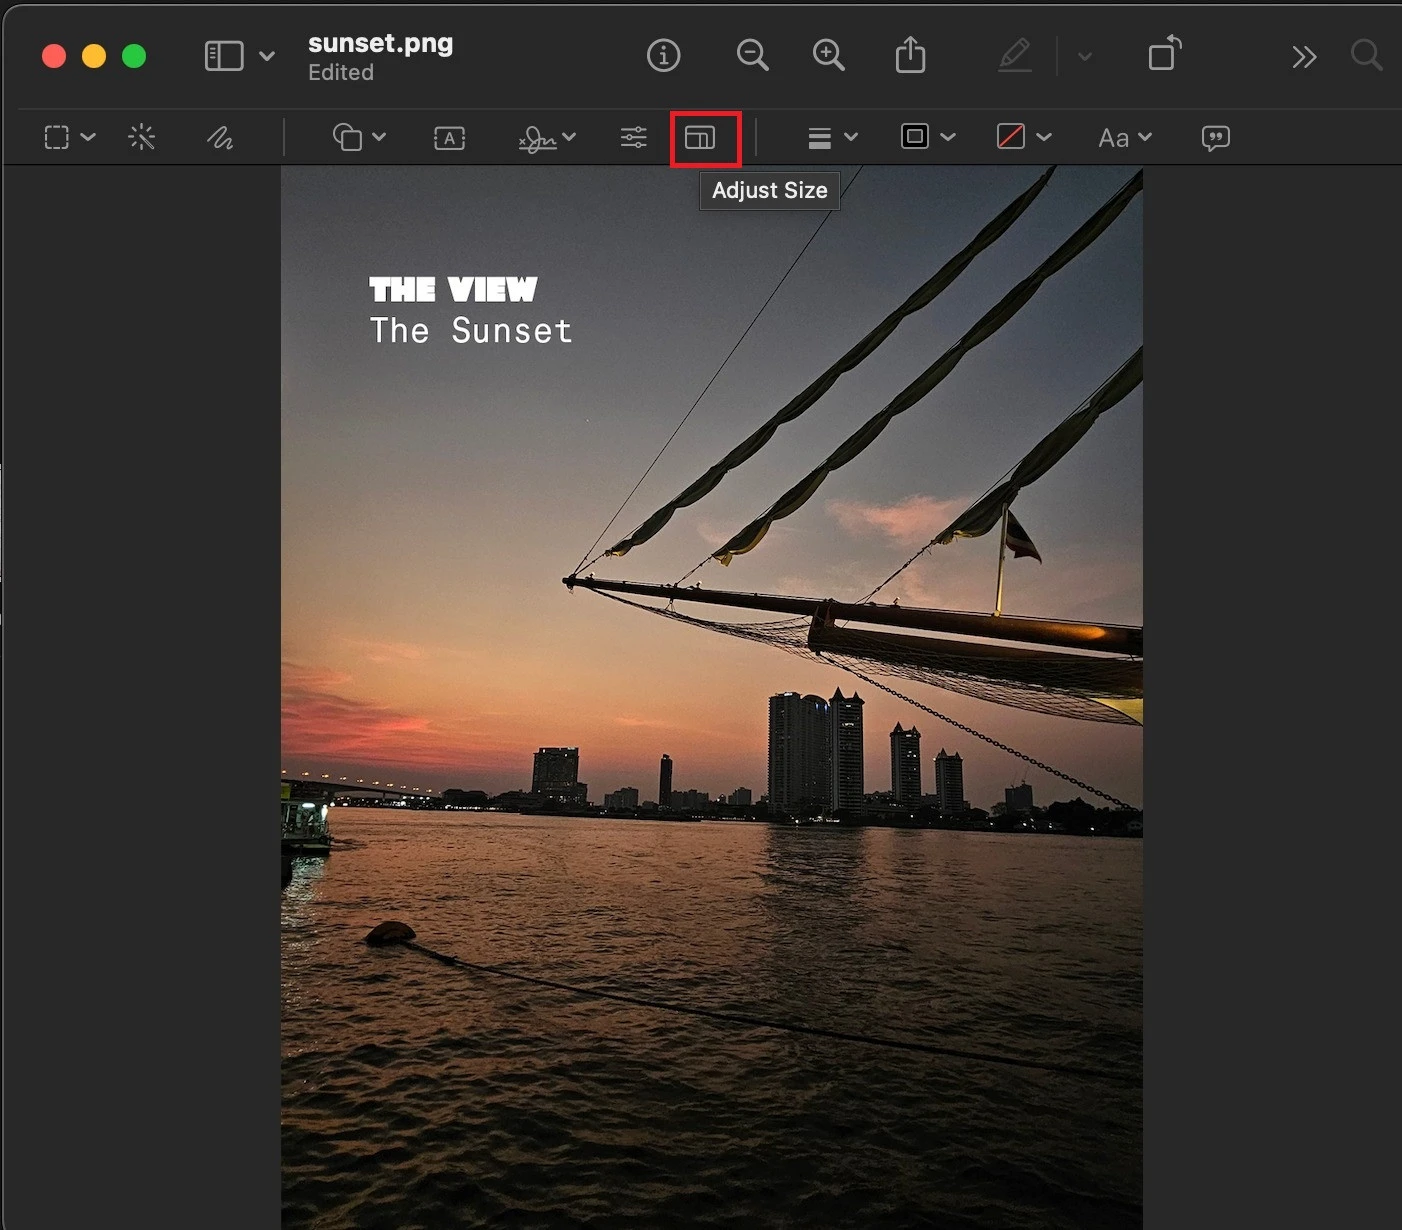
This brings up the Image Dimensions dialog.
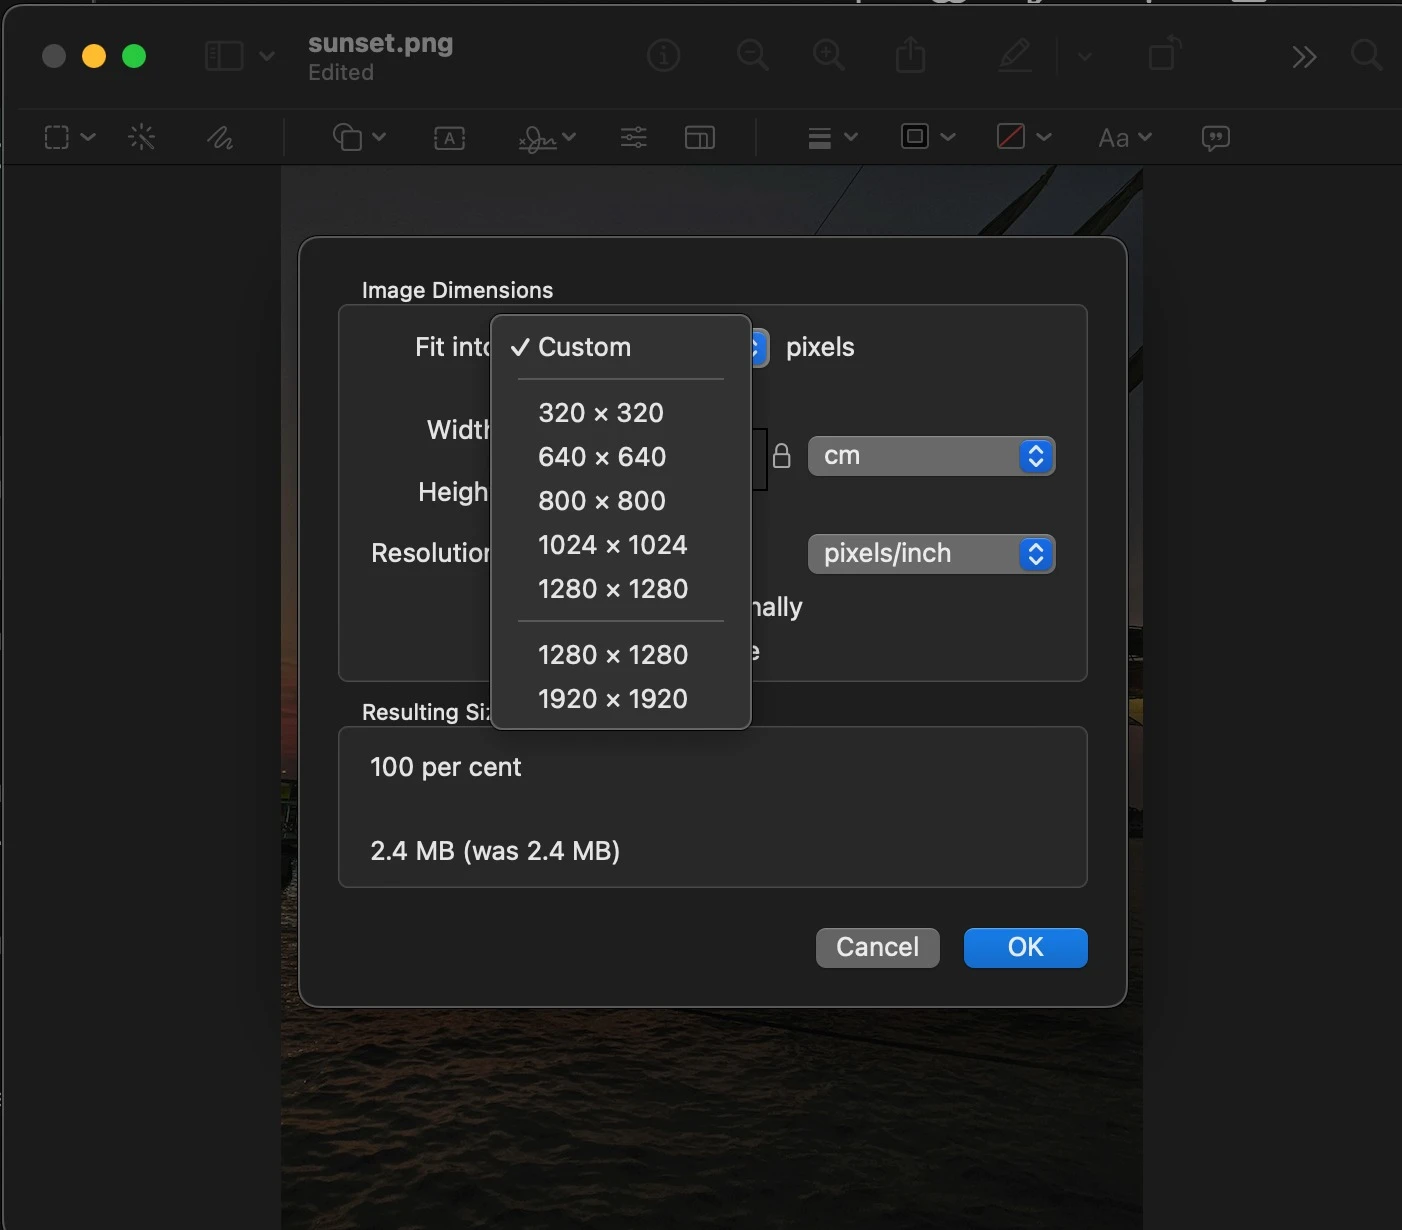
Here, you can set new width and height (in pixels or percentages), or even change the Resolution (PPI). As you adjust values, Preview shows the Resulting Size so you can see the new file size estimate.
After entering smaller dimensions, click OK. Finally, go to File -> Save As, give the file a new name, and save.
The saved image will have smaller dimensions and thus a much smaller file. You might choose a resolution of 150–200 PPI (instead of 300) and see the kilobytes drop.
Note: Changing resolution (PPI) alone won’t affect screen display size unless you resample.
Online JPEG Compression Tools
There are many free web tools to compress JPEGs in your browser. These “automatic” compressors use smart algorithms under the hood. A few popular ones:
TinyJPG
TinyJPG is an advanced compression with an intelligent algorithm. This simple tool can compress a JPEG file size by up to 80% without compromising on quality.
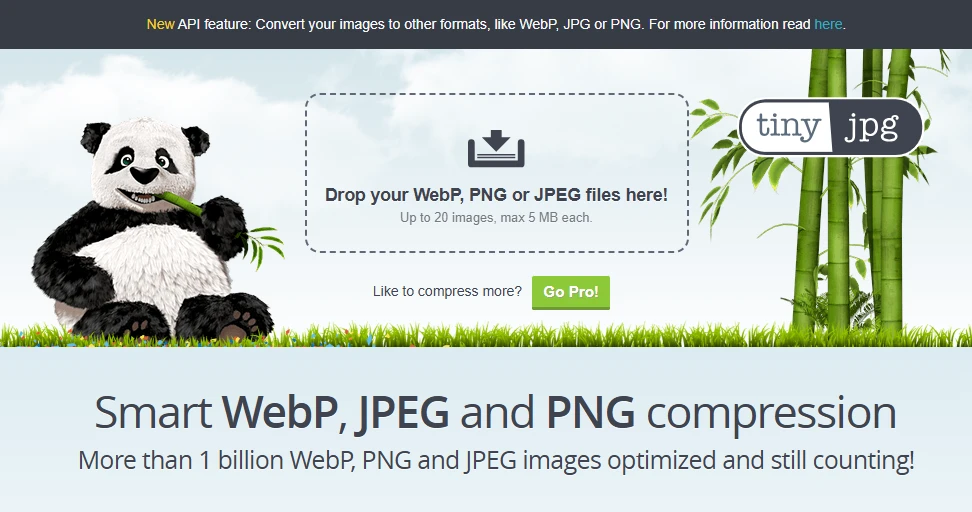
The tool’s algorithm is so intelligent that it knows how many pixels to reduce from a JPEG, whether you are uploading a larger file or a compressed file.
The tool has the capability to compress up to 20 images, and it supports major file formats, including PNG, JPEG, WebP, AVIF, etc.
Just Drag-&-Drop and it will “reduce the JPEG file size without wasting storage or bandwidth.
iLoveIMG:
This free JPEG compression tool is an all-in-one solution for your images. It has multiple tools like resize image, crop image, bulk JPEG image compressor, and much more.
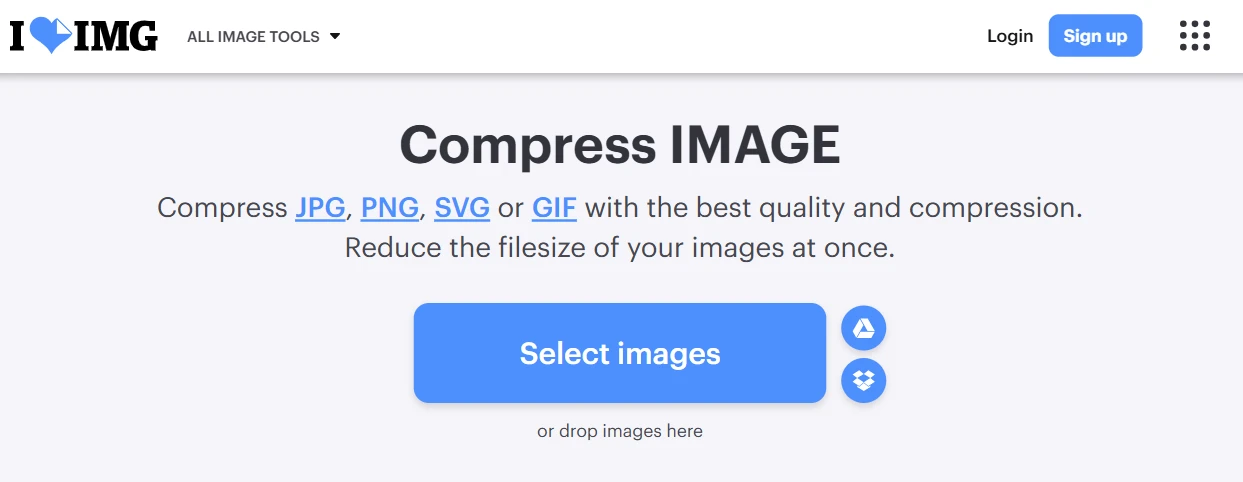
Just visit their website by searching iLoveIMG image compression. Upload your images or drag and drop images to convert them instantly.
The tool analyzes the quality of a photo and reduces its size without affecting quality.
iLoveIMG keeps the interface simple (no watermarks or signups needed) and returns smaller images quickly.
CompressJPEG.com (and similar to Compressor.io):
The JPG compression tool also has the same quality as the above two tools.
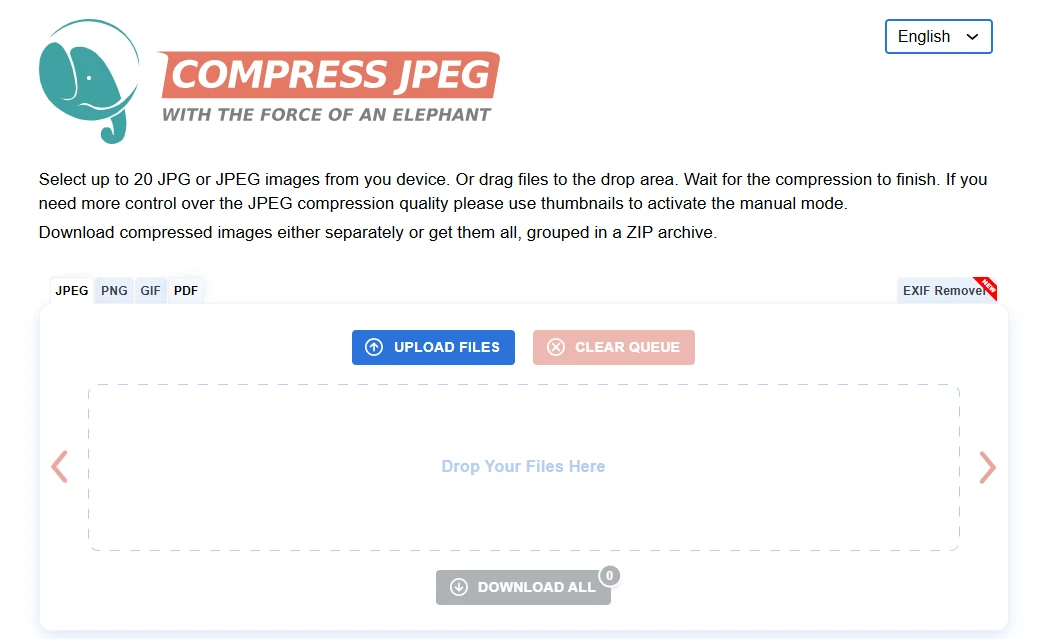
Either you can upload or drag-and-drop an image(up to 20 images.) In our test, we found that it can reduce approximately 70% of the size.
Such sites typically let you compare the original vs compressed and download the results instantly. Once complete, download them all with one click in a ZIP format.
Other tools
All online JPEG compression Sites work similarly. You can find hundreds of online compression tools to optimize your image.
A few best tools, like Fotor, FreeConvert, JPEG-Optimizer, Optimizilla, or web apps like imagecompressor.com, also offer one-click JPEG shrinking.
We can also say, online image optimizers are very effective for quick batches. Some tools have advanced compression that also removes extra data like camera details (EXIF metadata).
But these free image optimizer tools have a maximum limit for uploading files with number of files per day.
JPEG/JPG Compression on Mobiles
The one method that works on both mobile phones is to crop and save the image. Also, you can use an online image optimization tool on your browser to resize images. Just upload, compress, and download the image.
Android
On Android devices, you can use a dedicated app to compress photos. One highly-rated choice is Photo & Picture Resizer (by farluner.com).
You just need to select a photo, choose a new width (or percentage), and the app saves a smaller copy. It can also crop and rotate images.
iOS
You can install apps like “Compress Photos & Pictures (from Viewus)” to optimize your image. It allows you to adjust the compression level (quality) and dimensions before saving.
You basically select photos, choose a quality slider or target size, and the app outputs a smaller JPEG.
Also, IOS device has an advanced built-in Photos app that offers multiple options to edit images.
WordPress Image Optimization Plugins
Above, we discussed the manual method to optimize images, but you can optimize images on WordPress automatically. You just need to install a plugin, and it will compress your images
1. Smush
Smush (by WPMU DEV) is one of the leading image optimizers. You can set it up on WordPress, and it will automatically compress all of your images.
Smush is the leading image optimization plugin to optimize, resize, and compress images.
In practice, Smush runs automatically on uploaded images (or in bulk) and has settings for lossless or lossy compression.
The free version can resize images and offer moderate image optimization. If you want better compression, lazy loading, and a CDN, then you must go with its pro version.
2. ShortPixel
ShortPixel Image Optimizer (the source of much of this guide) is another top choice. You have just installed its plugin and set it.
This plugin supports all lossy, glossy, or lossless modes to compress image files. It’s known for high compression ratios with minimal artifacts.
ShortPixel offers 100 free compressions per month and considers choosing paid plans for bulk images.
3. Imagify
Imagify (by the team behind WP Rocket) is an easy one-click optimizer. Imagify automatically resizes images based on maintaining their quality.
You can choose from three compression levels (Normal, Aggressive, Ultra) for each image. Imagify also offers WebP conversion and bulk optimization. As WPBeginner notes, Imagify’s plugin lets you optimize “all of your images with a single click” and is very user-friendly.
4. Other plugins
There are many more, such as EWWW Image Optimizer, reSmush.it, and Optimole. In general, these plugins save time by auto-compressing images on upload (and often re-optimizing older images).
They also typically strip metadata by default, set images to use the sRGB color space, and may offer CDN or lazy-loading options.
Some of the plugins are free and some of paid. Using these plugins in your WordPress, you can save time.
Technical Tips To Optimize JPG Images
While compressing an image, there are a few technical terms to keep in mind for better compression. For example
Metadata and EXIF: Metadata is generated by the camera automatically, like camera settings, date, and GPS. So, removing metadata can save extra space.
Resolution (PPI): On-screen images are sized by pixels, not inches, so PPI is mostly irrelevant for the web. A 72 PPI image and a 300 PPI image of the same dimensions (in pixels) will look identical on screen.
Cropping: You can crop the unnecessary parts of a picture. Even a simple crop can shave off pixels and data. The cropping option is available on all smartphones.
Recommended JPEG Quality: if you have images with high pixels(5000 x 5000 px) then you should go with the recommended image quality based on the platform. For example, Instagram supports 1080 x 1080, which means you have more room to compress the image file.
Manual Uploading on WordPress: Of course, Automatic compression can save lots of time and cost. Whereas manual compression and uploading will take less space on the server and also offer the same speed as automatic. Also, adding a plugin improves the load on your website.
FAQs For Image Compression
1. How Much Quality Is Lost When Compressing a JPEG File?
It completely depends on needs. As we know, lossy compression always discards some image data during editing or saving. But when you use an external tool to optimize an image, it may lose 70 to 80% of its quality. This is the sweet spot that maintains visual quality while file size falls.
2. How Does Lossy Differ From Lossless?
Lossless compression is used in the PNG file format, which never discards details of an image. No matter how many times you edit an image, it maintains the same identity. PNG is a great option for designing graphics and icons.
3. Why Do Some Images Still Look Large After Compression?
A high-resolution image may look larger even after compression. For best results, first resize it to the needed dimensions, then compress. Also, your compression tool should not be running in lossless mode. One more thing to look at is the image file type, it should be JPEG, not PNG.
4. Which Is Better – JPEG or WebP?
WebP is a newer format designed by Google that offers the same quality as JPEG with a smaller file size. This file format is a great option to use with images, animations, and graphics. But JPEG is also a widely accepted format by browsers, software, and applications. Some WordPress plugins automatically create WebP versions.
5. Will My Image Lose Quality If I Keep Resizing and Saving It?
Yes. JPEG with lossy compression always discards some amount of data every time while image is re-saved. To minimize this, you can convert a JPEG file into a PNG file to avoid any loss of data. Repeatedly opening a JPEG and saving it (especially at lower quality settings) will gradually degrade it.
6. How to Compress a Jpeg to 20 Kb?
As we discussed above, you can use an online JPEG image compressor. If you have a large image, then you can compress an image multiple times.
7. What is the Different Between JPEG and JPG?
Both are the same file type, there is no difference between them. This is just a way to present a file. JPEG is a standard file format, where JPG is just a shortened version of the same extension used mainly for Windows systems.